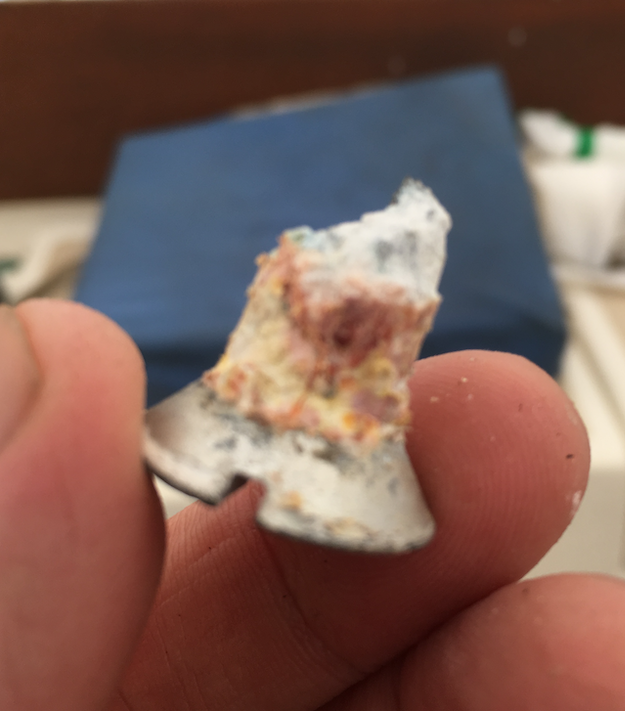
I was moving the rudder back and forth one day (on the hard) to check the swing, when I heard a CLUNK below the cockpit sole. I looked around and found this little beauty. This is the rudder stop that was welded to the steering bracket. It stops the quadrant from turning too far either side.
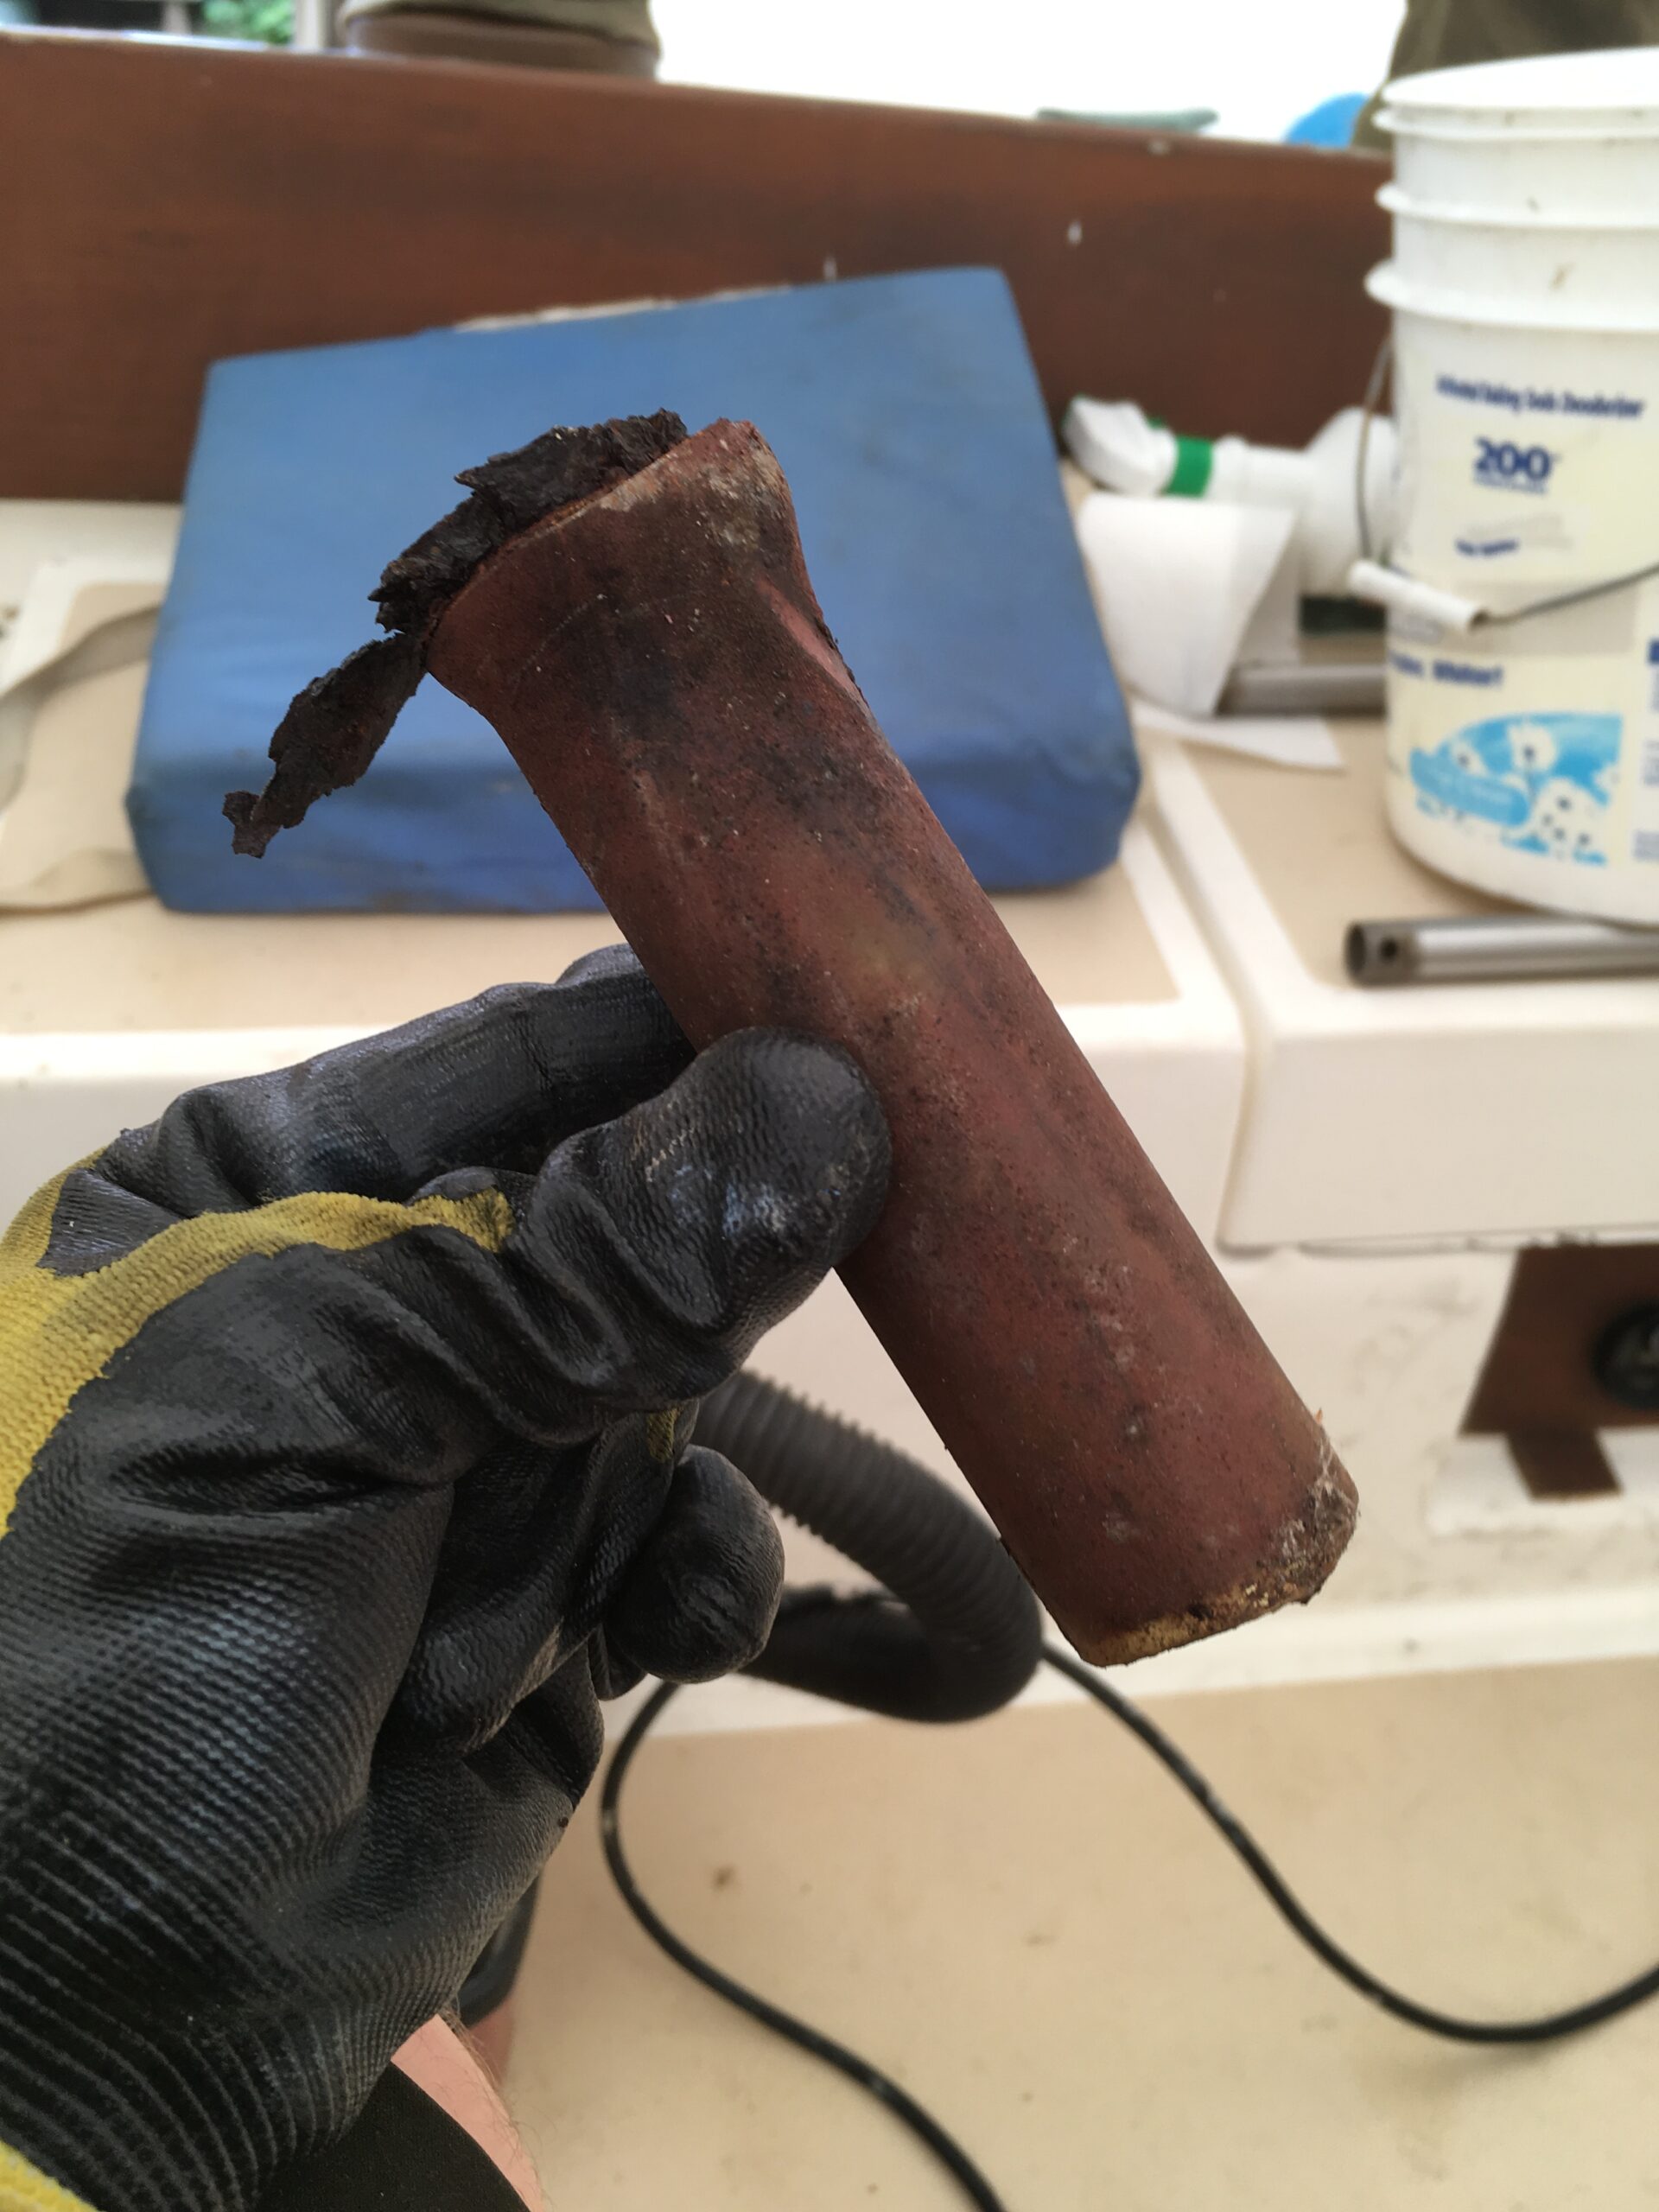
Cape Dory builders made use of generic steel in certain internal areas. The steering bracket and the horizontal backings for shroud pad-eyes are two such areas. When surveying a Cape Dory, these are two places to check first for corrosion. My chainplate systems were in good shape when I surveyed Sanderling for my own purchase, and still are. Just a little surface rust in a few spots.

But the steering bracket was corroded even when I purchase her. So the time to deal with it had finally come with the rudder stop going CLUNK! Tied to this project was a pedestal renovation and cockpit sole rebuild, since the long standing water intrusion also got into the sole core (see the post Get Some Sole).
The stock metal used in these areas was only covered with a slim coating of what appears to be primer by Cape Dory builders. The leak in this area was due to either poorly bedded pedestal at build (others have suffered this condition), or movement of the pedestal over time, which compromised the caulking. Lots of water came through here. There was most likely galvanic corrosion also.
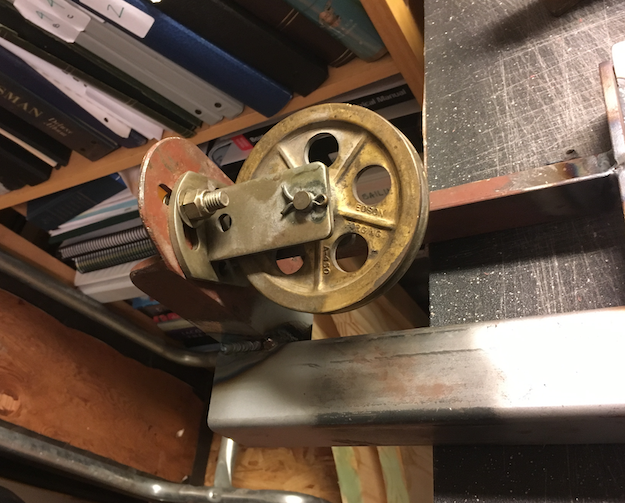
The pedestal backing plate on these Cape Dory boats came with the Edson steering solution kit they used, and Edson calls it the cross-wire idler. It was a fairly thin piece of cheap metal in the 1980 version, and was actually a weaker link in this system than the original metal Cape Dory used to fabricate the rest of the overall steering support system under the cockpit sole.
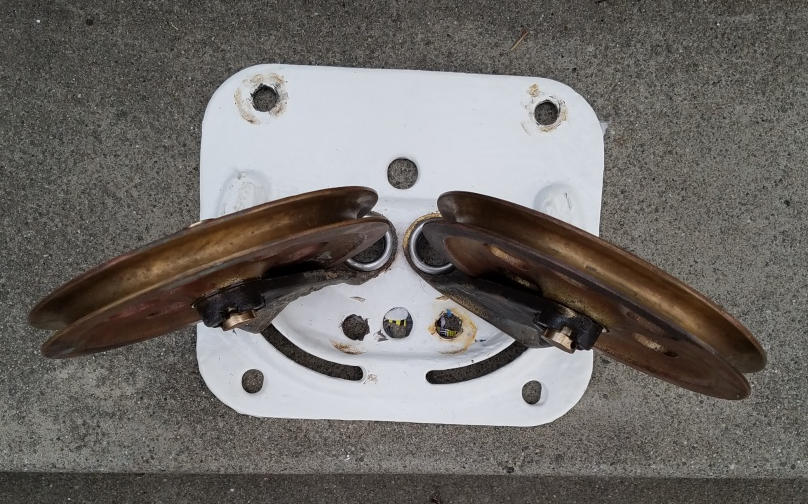
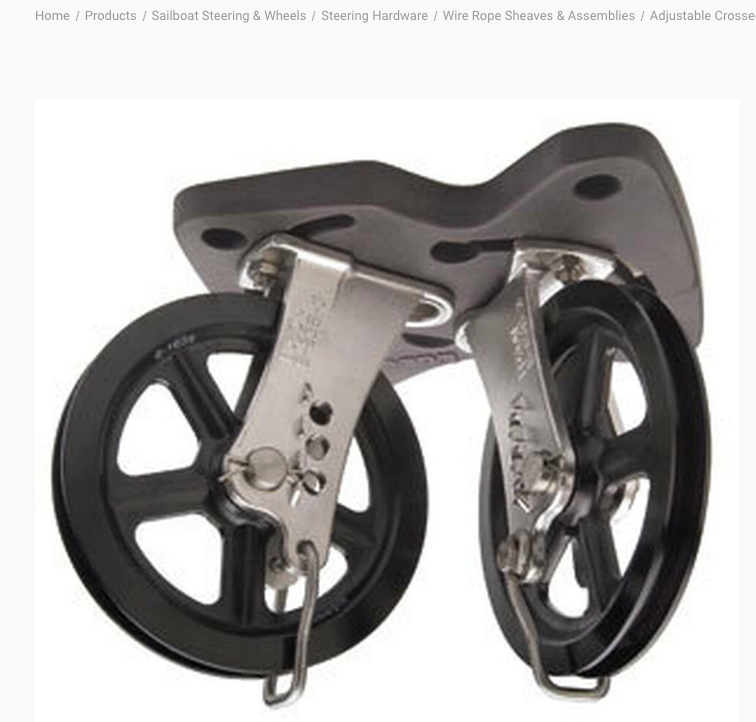
I do not believe Edson has any of these older idler plates. They pointed me to the new versions when I inquired. They are $459 (not cheap) and made of aluminum. Edson was only interested in selling me an entirely new system. But on my salary there was no way I was going to toss out my bronze sheaves for costly aluminum ones. They were still in great shape.
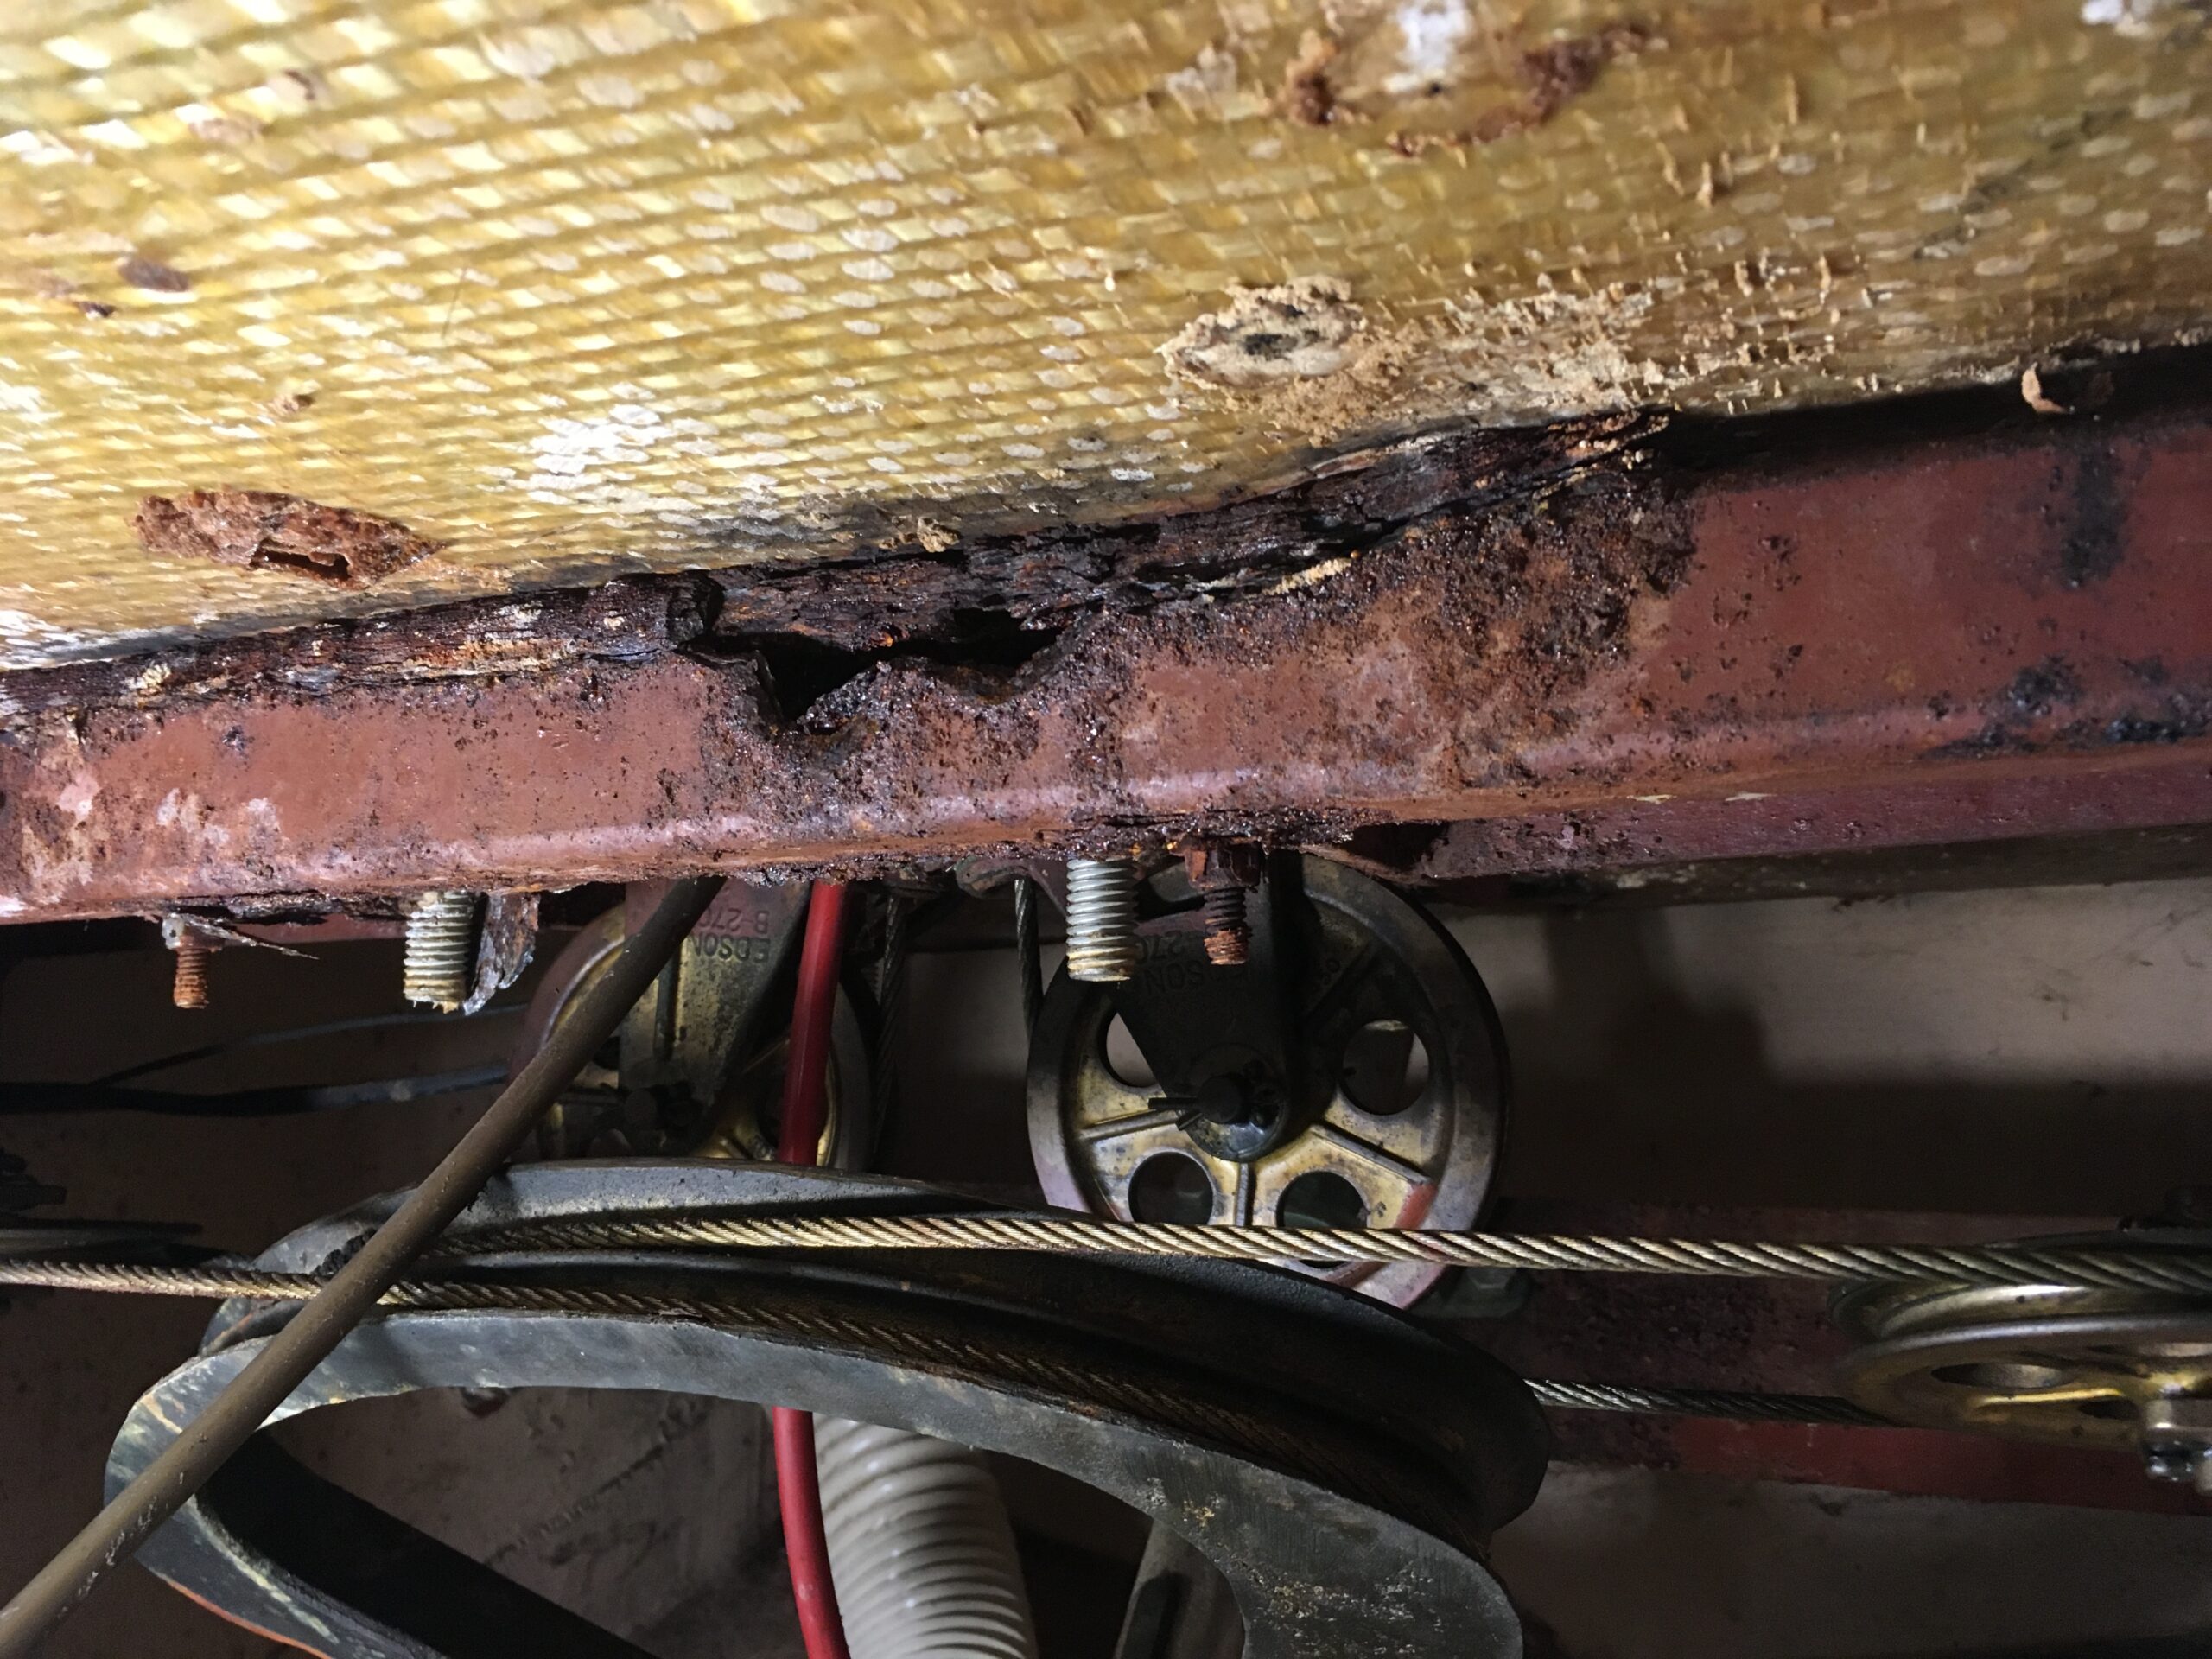
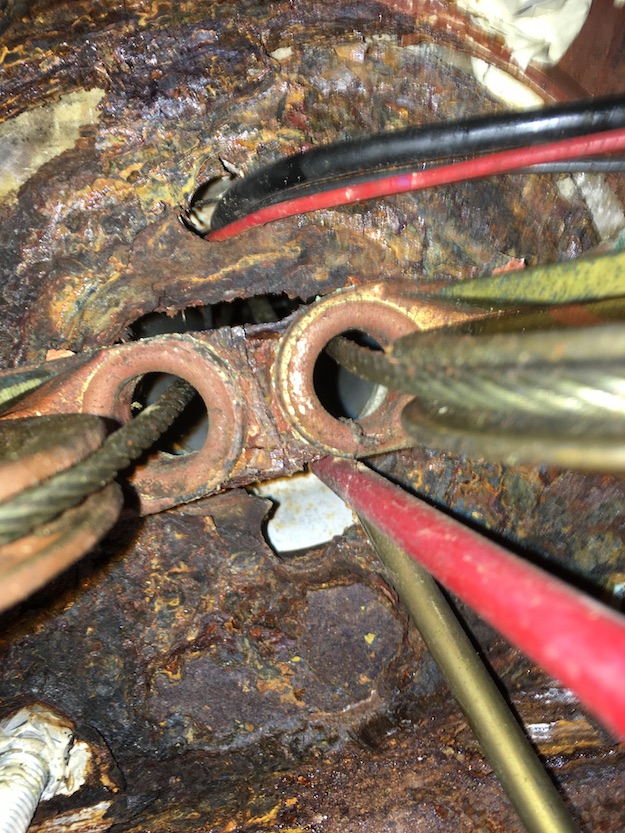
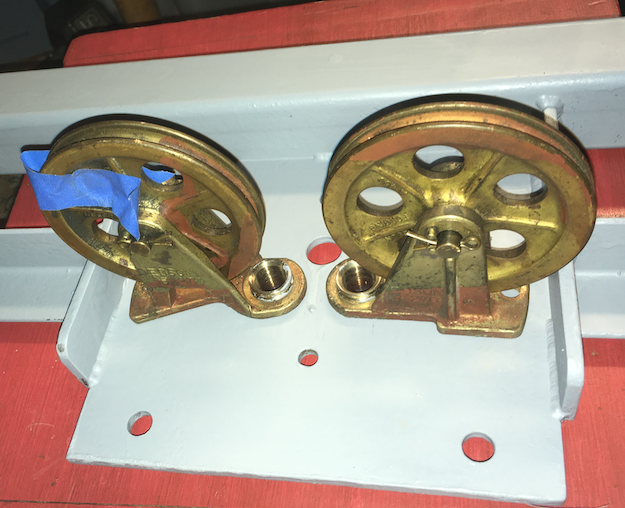
When I got my rotted steering bracket out it looked like Cape Dory builders had just welded the Edson provided idler plate onto their yard-fabricated bracket that holds three things together ( pedestal idler, the four sheaves, and the rudder stop) . You can see below the original Edson idler plate attached to my CD fabricated steering bracket was almost entirely GONE.
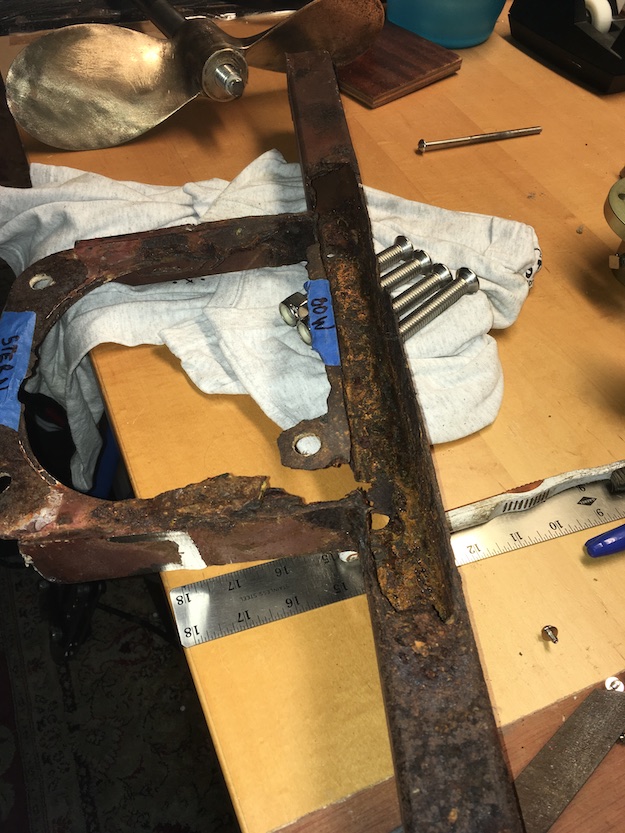
The two outboard sheaves were still OK. So I had a local fabricator take the entire thing and cut away all the bad stuff, and he made a replica using stock metal for about $400 (New England area price). Down south you can probably get it done for half that.
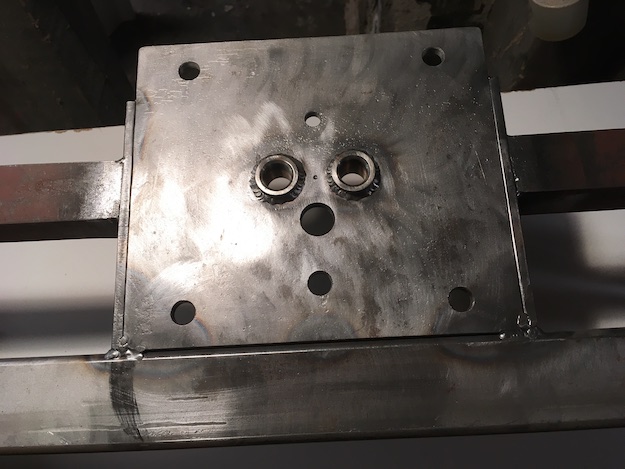
I had him embed two stainless grommets as primary wire-guides that were machined to take retaining rings, so the sheaves would mount on them as before and swivel to adjust, but could be removed if needed. On the original Edson idler these were press-fit ss grommets that allowed the sheaves to swivel but made them permanently fixed to the plate. I also called for a 1/4 inch thick idler plate, and a rudder stop that would be removable for doing maintenance on the quadrant area.
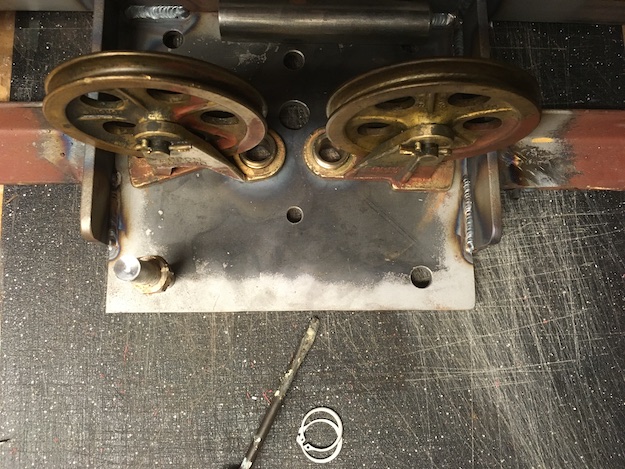
I did not get fancy with machining a swing arc for the hold-down bolts like the original Edson plate had. There was no need since it was not going to be critical to continually adjust the positions of these first two sheaves. And it was easy to put the bracket in and out via the port lazarette. So I installed the sheaves on the bracket, aligned all the sheaves and wires, marked the positions of these first two sheaves, then removed the bracket and drilled the thru-bolt holes needed.
That long adjuster arc for the tie-down bolt is really only necessary if you are selling a system to work on lots of different boats (or building a new boat) and don’t know where exactly your pedestal, sheaves, and quadrant will be in relation to each other. On a boat already built, those are already fixed and won’t change. I found that since I could still fully adjust the second set of sheaves (no change to them) that proved to be more than enough fine-tuning for the wire leads where they finally met the quadrant.
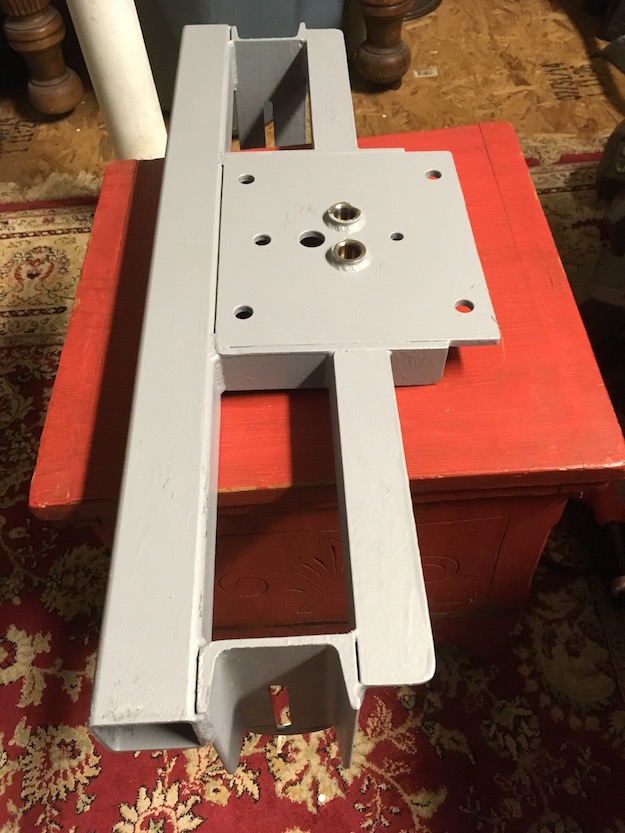
I did not feel this needed to be stainless steel fabricated either. That would have been a much higher cost and difficult to drill, modify or tweak. I gave it 2 coats of epoxy two-part primer. With proper bedding of the pedestal and leak mitigation it can last indefinitely.
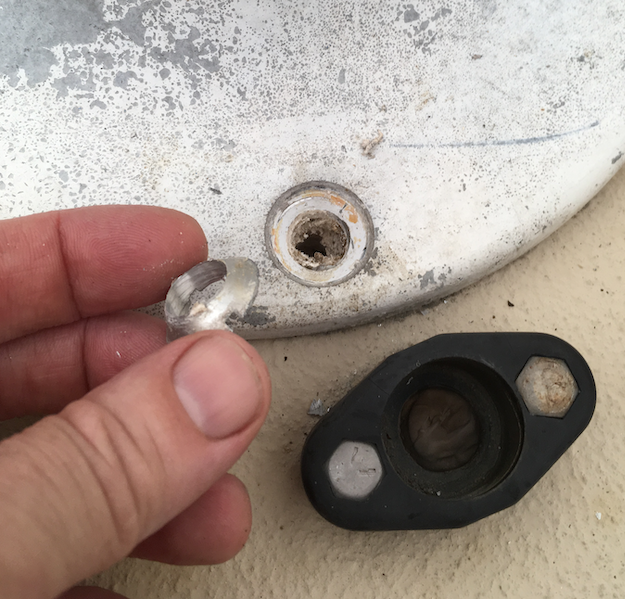
And obviously the pedestal had to come off to do all this. Forty year old aluminum Edson bolts are pretty much ready to break….especially with years of continuous water intrusion.
…but other times you gotta fight with them. If they are aluminum, which is soft, using the correct type and size of bit you can can drill the head off cleanly from above without damaging the pedestal flange. But it will not be fun if those old bolts are stainless steel. You’ll need to go at those from below, and may need to cut the nuts off with a specialized cutter or even a torch.
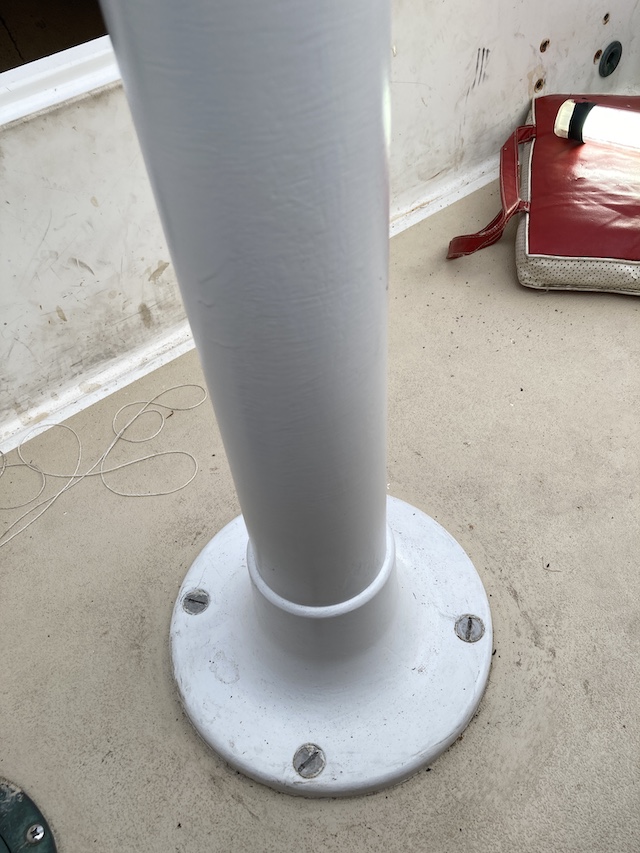
The pedestal guard (the cockpit oh-shit handle) has these two feet to hold it in place, which were through-bolted (piercing through the old steering bracket below). I considered them to be a huge potential for leakage onto my nice new bracket, so when I redid the cockpit sole I made it thicker overall, with a synthetic core, and solid glass in those footer bolt areas, so I could get the holding power I needed for these guard feet using lag screws instead of through-bolts.
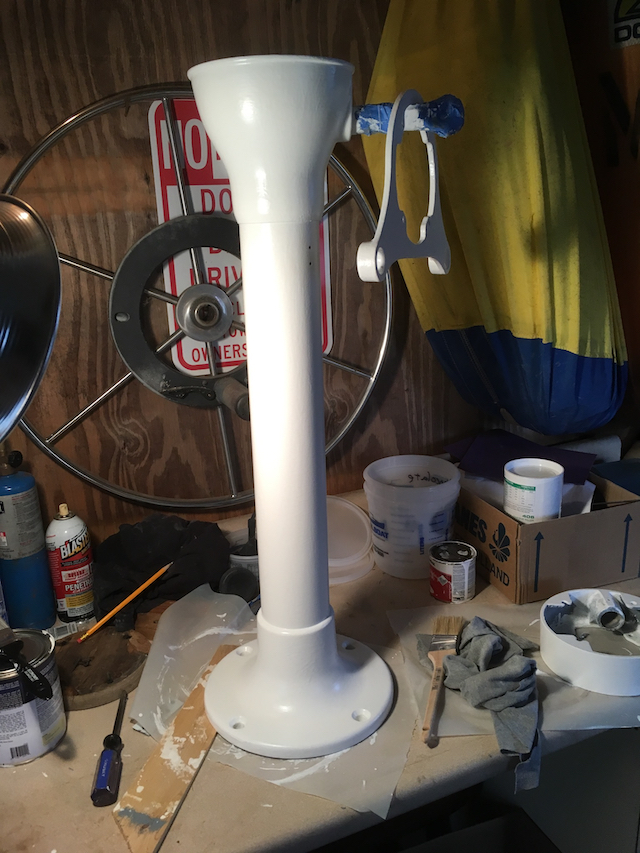
The Edson pedestal was in good shape so I serviced it by adding new nylon shims for the control arms (from Edson), new ss bolts, and a new paint job.