Best practices and electrical components have improved a lot since 1980. So for Sanderling, and the upgrades I was interested in, I totally embraced the Ohm. Some boat systems can be jury rigged. But the electrical system isn’t one of them, especially not if you plan to increase demand on the existing system.
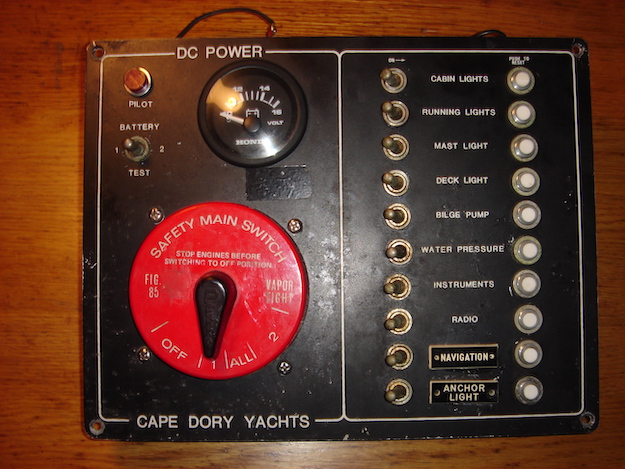
Surveys don’t include any significant analysis of wiring or the electronics those wires serve. So for any new owner, documenting the status of the existing system is always a good first step even if you don’t plan to expand. Sanderling had very basic components sparsely wired for DC circuits (note the 10 AWG wire off the common post serving all the breakers). The main hot bus is a solid copper wire, soldered in through the feed side of all breakers like a backbone. Typical 1980’s. She also had a jury rigged AC system using a residential sub-panel box that had turned to rust, probably because her original AC panel was damaged and removed.

So for Sanderling the long term plan was to upgrade her systems from a 1980’s weekender to a cruiser with a few amenities and room for expansion. For me that did not mean frozen ice cream and HD TV for a week at anchor without running the engine. It meant being able to run pumps, electronics, or even the autopilot for certain periods if I chose not to run the engine (or couldn’t run the engine). I created a spreadsheet to actually anticipate what kind of power I would need for sailing, motoring, or anchoring. That helped me estimate the size of the battery bank I would need, and also the kind of charging I would need to keep the batteries happy.
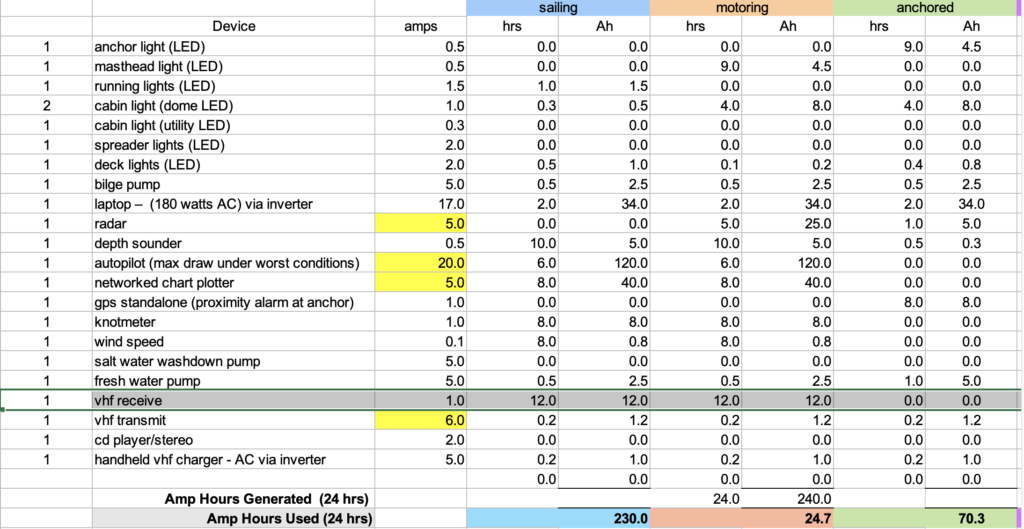
Sailing and motoring needs differ depending on variables like how often you manually steer vs. using an autopilot, alternator output, etc,. After figuring out what I wanted the boat to be able to do in various scenarios, I estimated the amp-hours each scenario would require over a 24 hr period. Then I subtracted any amp-hours that might theoretically be replaced in that same 24 hr period from charging sources during each scenario (surplus alternator amps, solar panels, wind, etc,.)
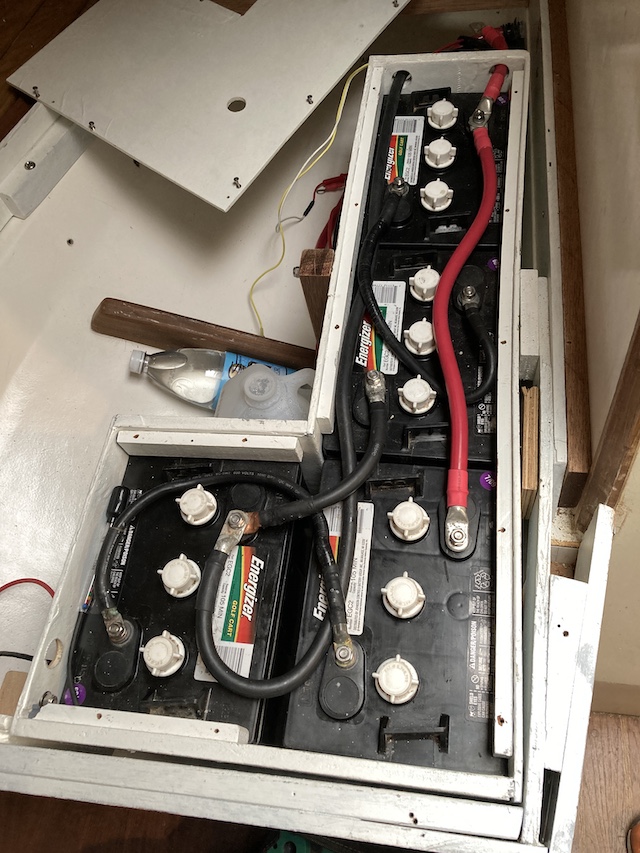
The sailing scenario above (230 Ah) would require the most from the house batteries. If you use Calder’s 50-80 rule (never go below 50% state of charge, and charge to 80% in regular use) then I would need a house bank with total capacity of 650 Ah to actually get a usable 200. But space and cost were factors, so I compromised by installing four golf cart batteries (6 volt) that would produce a bank with total capacity of 460 Ah. To get my 200 usable amp hours for the most demanding scenario, I’d have to either charge to 100% (time consuming), install a solar panel to offset consumption, or ration the 138 Ah I would have if the house bank was only at 80% charge.
- Four 6 volt deep cycle in series/parallel to create a 12v house bank with 460 Ah
- Dedicated crank battery (750)
- Pure sine inverter (isolated circuit for laptops, or any sensitive tech)
- Modified sine inverter for miscellaneous (undiscriminating) devices
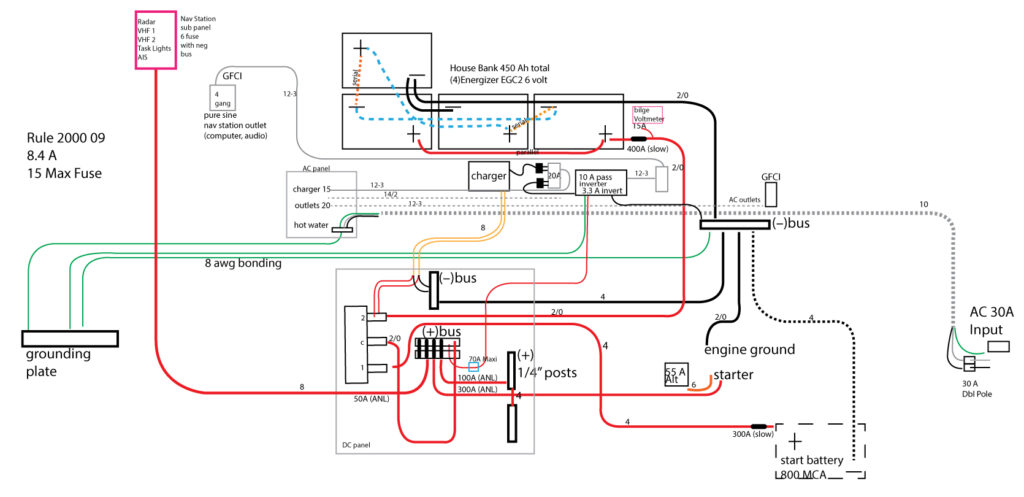
- Rewired and labelled DC panel busses and connections
- 2nd DC panel for expansion
- Custom AC panel in new location
- DC sub panel at Nav station (with alarm panel)
- DC outlets and USB charge ports at Nav Station & cabins
- High Amp fuse bus
For the upgrade every connection and circuit was replaced, except the original circuit for the cabin lights (which would now serve low power LEDs) and the existing galley/cabin GFCI AC outlet branch circuit (which was a still healthy “direct burial” Romex 12-2 with ground). I fished wire in places I did not know existed on a Cape Dory! But the panel design and bus wiring was done through the winter on the bench in a toasty warm workshop.
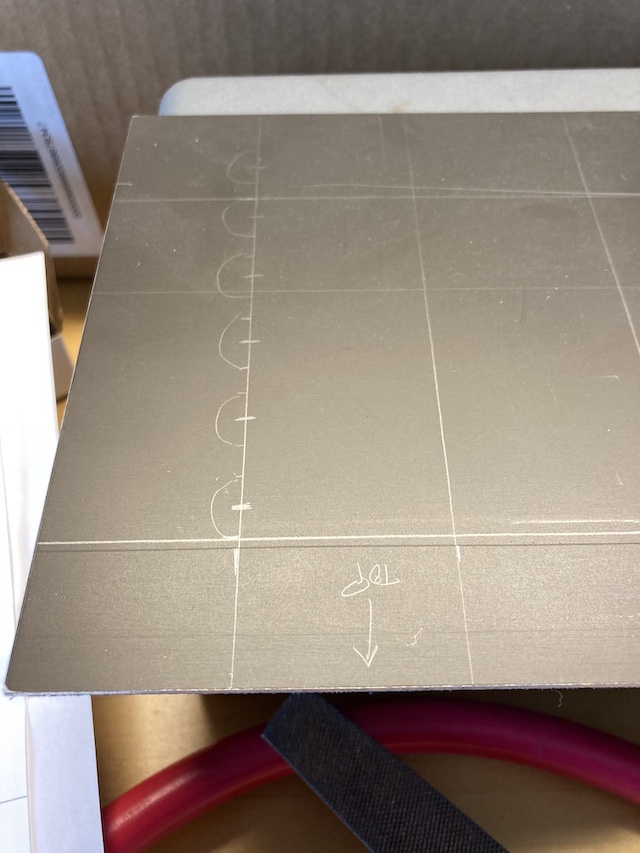
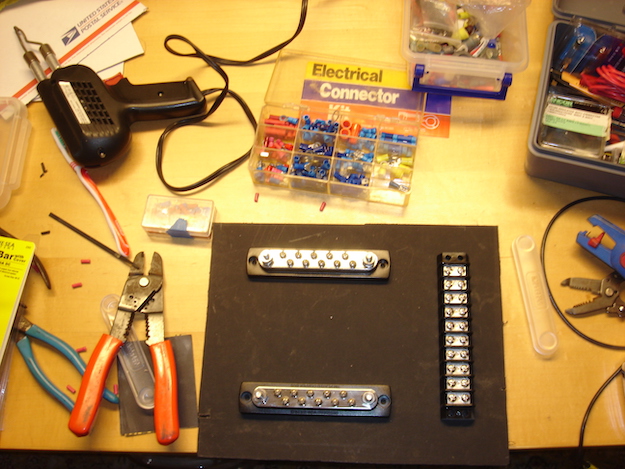
I found a source on eBay for 1/8 inch aluminum plate that had a nut-brown finish on one side that looks good with the CD interiors. So I decided to just make my own panels from scratch (I also could not afford Blue Seas products). It’s not difficult to make a jig out of hardwood so you can drill out all your holes in consistent rows. With a special multi-step drill bit you have all the sizes you need in one bit, and the aluminum is easy to work with.
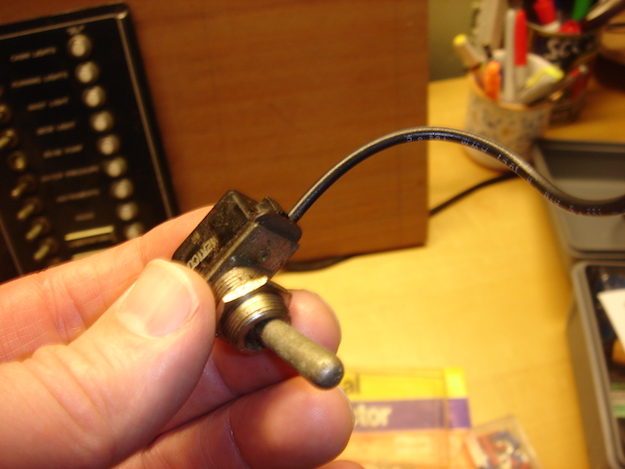
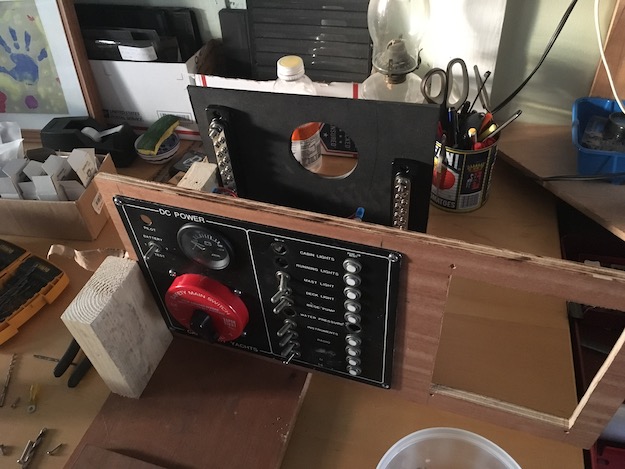
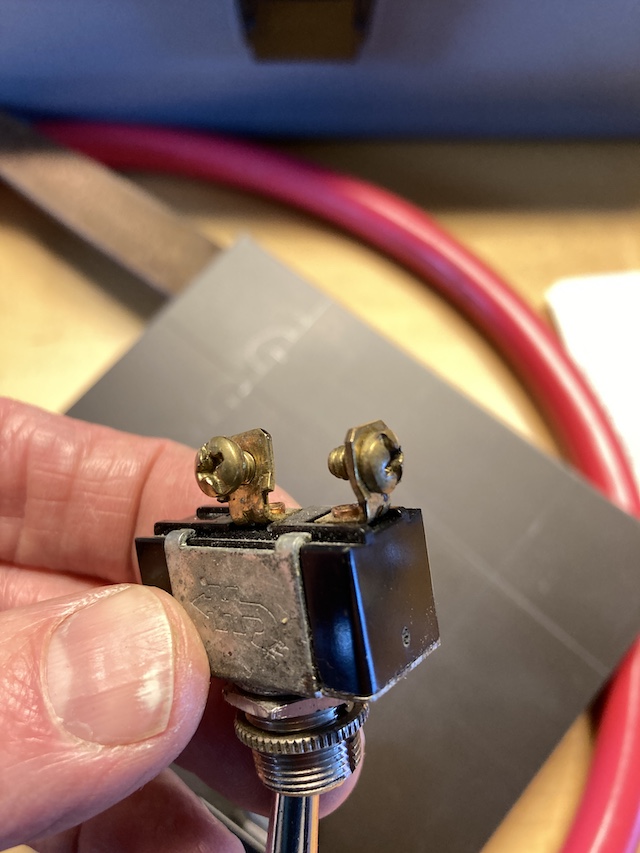
Updating your electrical system doesn’t mean replacing it entirely ($$$). These original “aviation” toggles used by Cape Dory are rated for 6A @12 VDC (ok for small loads). But the older ones have 16 AWG pigtails (only rated a mere 10A if the circuit is*under* 6ft length). That doesn’t meet todays standards if the switch follows a breaker rated higher ( 15, or 20 Amps). Cape Dory seems to have just used the same low amp toggle for all circuits regardless of the rating of the breaker, even for AC circuits. And depending on who makes the switch, the AC rating and DC rating may not be identical. I have seen these older toggles heat up considerably on AC panels with loads that did not trip the breaker.
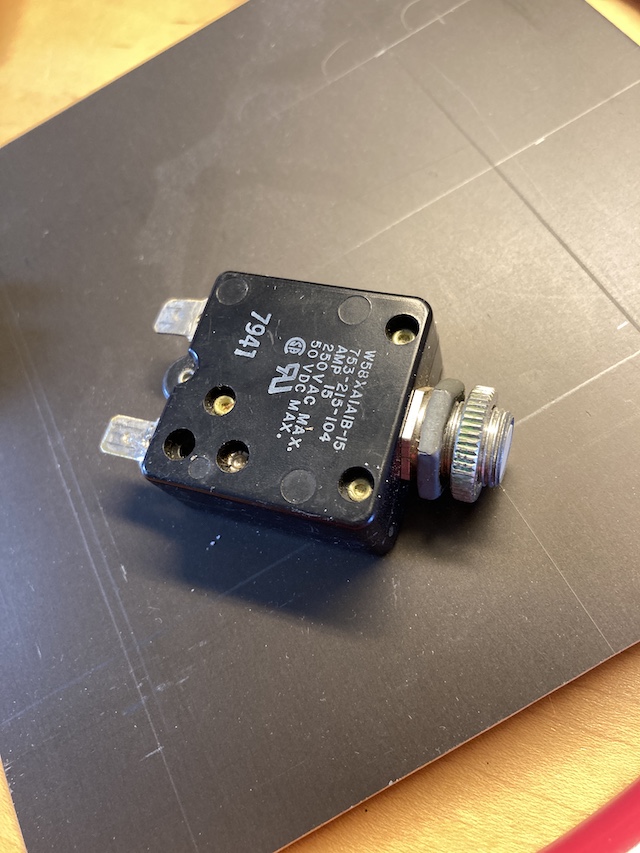
So the toggles are fine to replace as long as you purchase a quality switch rated *at or above* the 12 VDC amp rating (or 125 VAC rating) of each particular circuit’s over current protection. Use the same gauge wire for the entire circuit, and get replacement toggles with ring terminals instead of solder or blade connectors. The same applies to replacing a push-button breaker, you can buy them with ring terminals instead of blade.
Best practice these days is also to fuse every circuit at the source. There is an ABYC exception for “starter circuits”, so you can still forego the fuse at any battery that might be used to start with, but it has become common practice to have a high-amp slow blow fuse at each battery bank.
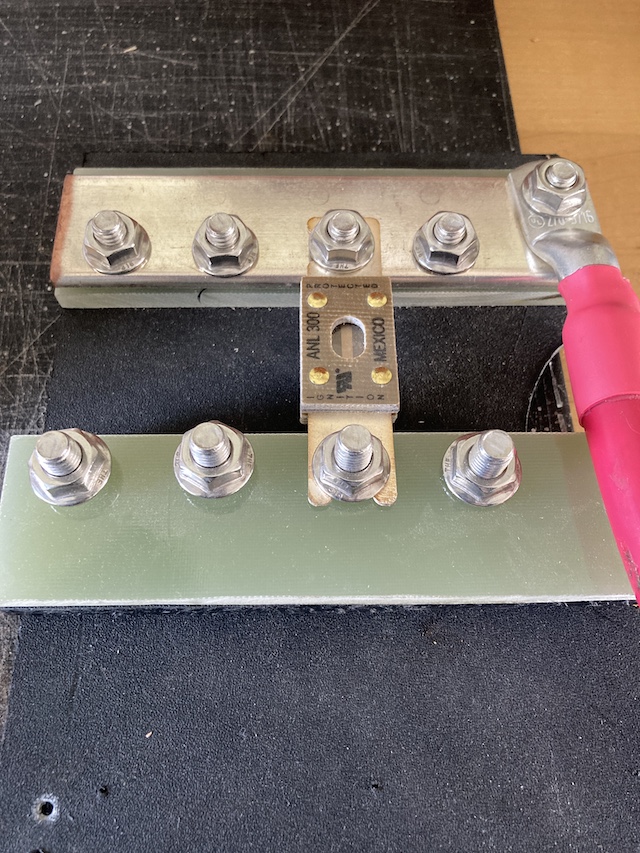
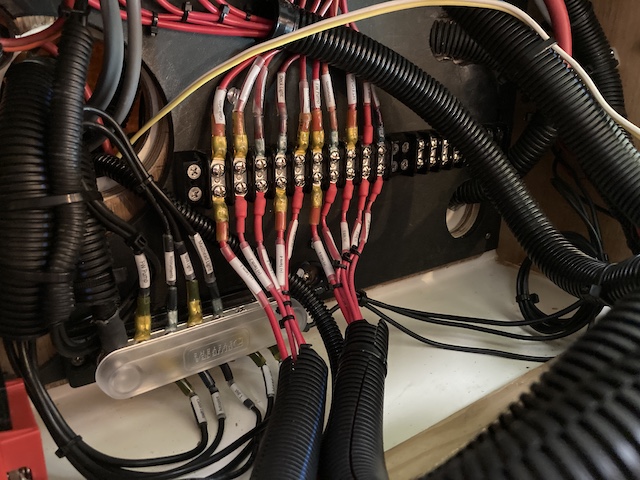
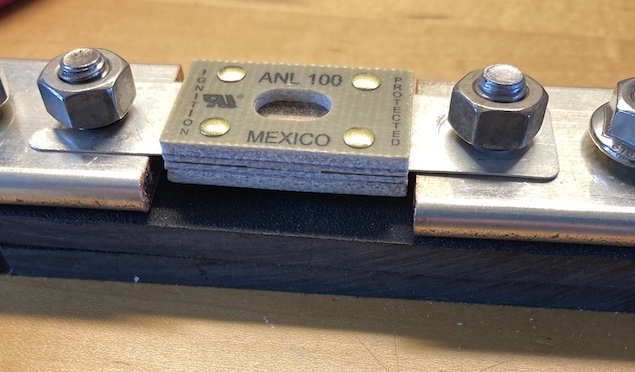
For making your own busses you can buy tin coated 110 copper bar online. You can lookup the conductivity ratings so you know you have a thick enough bar. For my purposes, a 1/4″ thick by 1 -1/2″ wide bar exceeded the combined amperage loads of the fused circuits it would serve.
The completed high amp fuse block is fed by the common pole of the selector switch. The fuses off this block feed the DC panel hot busses, the starter circuit, and the inverter, with room for expansion.

If you decide to keep using the toggle switches, you’ll need a terminal block to organize the load side (from toggle to actual circuit). The line sides of the push-button breakers are all connected directly to the hot bus. That is one advantage of replacing all the push button/toggles with magnetic breakers instead (if you have the $). Because in that installation the hot bus is integral to the breakers on the panel, and you could eliminate the intermediary terminal block shown in my installation above.

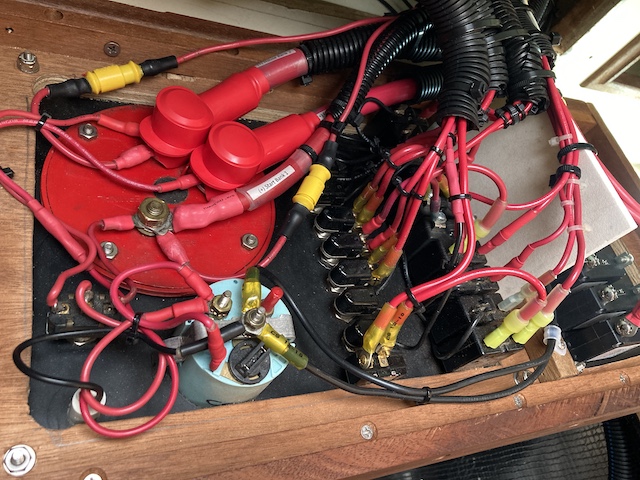
But also consider that a terminal block is still good for organizing, and stand-alone hot busses can be useful for expansion. Here’s the additional DC panel (above right) using magnetic breakers. The pumps and sub-panel main were all put there using magnetic breakers, keeping the boat’s low-amp circuits on the original push-button panel. The two digital voltmeters are wired to show voltage for each bank measured at the battery terminals (not off the selector switch).